I have good news and bad news for any players looking to complete Gunsmith Part 1.
First, it’s not a difficult quest nor is it particularly expensive to complete. Once you’ve unlocked the Flea Market, you’ll likely be spending about 60K Roubles on this quest in total and almost no dedicated time.
Unfortunately, if you don’t have access to the Flea Market, completing this quest is very dependent on the luck of your loot drops.
Escape From Tarkov Gunsmith Part 1 Guide
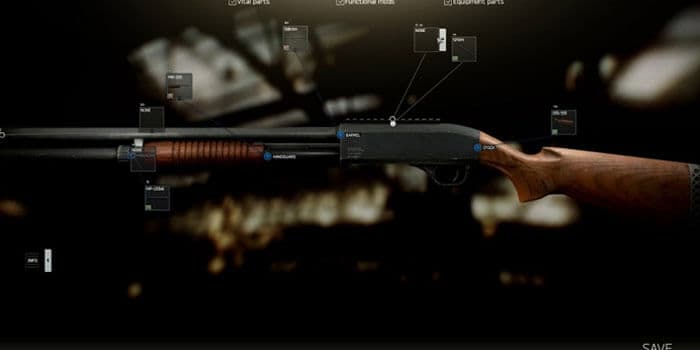
To complete the Gunsmith Part 1 quest you need to provide Mechanic with an MP-133 shotgun (pump action, not the semi-auto MP-153) with
⦁ More than 55 ergonomics
⦁ A laser attachment
⦁ At least a 6 round mag
⦁ Less than 950 combined vertical and horizontal recoil
⦁ Takes up at most 4 inventory spaces
This translates into an MP-133 shotgun with
⦁ Any laser attachment
⦁ Any foregrip attachment
⦁ The Plastic Pistol Grip for MP-133/153
⦁ A 6 round magazine tube
⦁ Any muzzle break
How to complete Gunsmith Part 1
This quest requires you to modify a shotgun with parts that you frankly can not acquire outside of one specific route without the Flea Market.
You need to acquire 2 Plier Elites and a Screwdriver to barter with Mechanic for the MP-133 Tactical shotgun. This can be done either by purchasing them from the Flea Market, or fishing through tool boxes, sports bags, and jackets for tool spawns. I really can’t recommend Shoreline and Reserve enough for fishing through tool spawns.

You then need to purchase the NcSTAR Tactical blue laser LAM-Module from Skier level 1.
Finally, you need to acquire the Plastic Pistol Grip for MP-133/153 attachment.
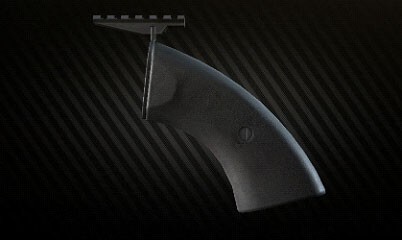
This pistol grip is unfortunately not available for purchase and the best way to get your hands on one is to spawn into Reserve or Factory as a scav, look around for a scav that has a shotgun with this grip, and take his shotgun. Luckily, it’s not too uncommon of a spawn, and fairly obvious when a scav has this attachment, so it shouldn’t be too difficult to find.
Assembling the shotgun
To finally assemble the shotgun for trading in
⦁ Remove the flashlight and 25 mm mount ring from the shotgun.
⦁ Remove the Trijicon RMR, Low profile mount for Trijicon RMR, and the Kiba Arms International SPRM mount for pump-action shotguns.
⦁ Attach the Plastic Pistol Grip for MP-133/153
⦁ Attach the NcSTAR Tactical blue laser LAM-Module
And now you’re all set to turn the shotgun into Mechanic, and either utilize the Trijicon RMR on your own guns, or sell it back to Mechanic as well.
Rewards for Gunsmith Part 1
Completing Gunsmith part 1 nets you a total of
⦁ 6,500 character EXP
⦁ 0.04 Mechanic Reputation
⦁ 20,000 Roubles
⦁ A GLOCK 17
⦁ 50 rounds of 9×19 mm Pst gzh


