If you make a quick Google search about the least favored map for Sova, you will quickly realize that Split is where our Russian Initiator makes the rarest appearance relative to other maps.
Split is a map that features towering buildings, fixtures, and pillars. These in-game elements block off significant amounts of the skybox where Sova’s Recon Bolt usually flies free of obstruction.
The map layout of Split makes it extra difficult for Sova Mains since lineups in Split are more challenging to land properly because a tall wall or pillar might get in the way of the Recon Bolt’s trajectory.
However, even though Sova does not seem like a good pick on Split, his skillset is so strong that this Russian Initiator still makes an impact regardless of the nerf that Split imposes on Sova. All that Sova Mains have to do is get more creative in formulating Recon Bolt lineups.
Today we look at five Recon Bolt Lineups for Split. These lineups will surely be helpful if you play Sova on Split. Let’s go!
Sova Recon Bolt

Sova’s Recon Bolt is arguably one of the most valuable Signature Agent Abilities in all VALORANT.
Recon Bolt is a cooldown-based Ability that refreshes every forty (40) seconds. Players can add up to two bounces to the Recon Bolt Arrow, which opens up a world of possibilities regarding lineups. His Recon Bolt also features a charge meter so Sova players can alter the total distance the Arrow travels before it lands.
When used correctly, Sova’s Recon Bolt is the closest thing players can get to wallhacks without the repercussions of hacking. When placed at certain spots within Spike Sites, Recon Bolt can reveal most of, if not everything, inside the Spike Site. This makes it a very powerful tool when Attacking or Defending bomb sites.
We have previously featured Recon Bolt Lineups for Ascent and Recon Bolt Lineups for Bind, which you can read about by clicking on the links above. Useful lineups are featured in these articles, which you can add to your bag of tricks.
Split

Split is more or less a Defender-sided Map because Attackers only have one way to get into the Bombsites.
The map orientation situation makes it more difficult to Attack in Split than to Defend. Because Split is oriented, Attackers will be funneled through small passageways to the site. Defenders usually have an angle advantage versus the Attackers on Split because of this.


However, through smokes and Sova’s Recon Bolt, attacking and defending your team can be a little bit easier. Sova’s Recon Bolt will be the key to driving out enemies from tight angles.
You and your team can take sites faster, safer, and more efficiently through the Recon Bolt.
Split Defending – B-Main/B-Lobby Recon Bolt

Let’s begin with Split Defender side lineups. This first Recon Bolt lineup reveals almost all of B-Main and B-Lobby, which can give you and your team the early enemy headcount you need to rotate accordingly.
This first Split Sova Recon Bolt lineup is great to add to your collection because Sova can help defend two sites simultaneously.
This Recon Bolt is shot from A-Site so you can help your teammates at B-Site. At the same time, you still have your Owl Drone, which you can use to scout out A-Main and deduce where the enemies are, depending on the information you have gathered.
- Look for this corner on A-site Ramps:

2. Hug the corner, then turn around and look for this corner:
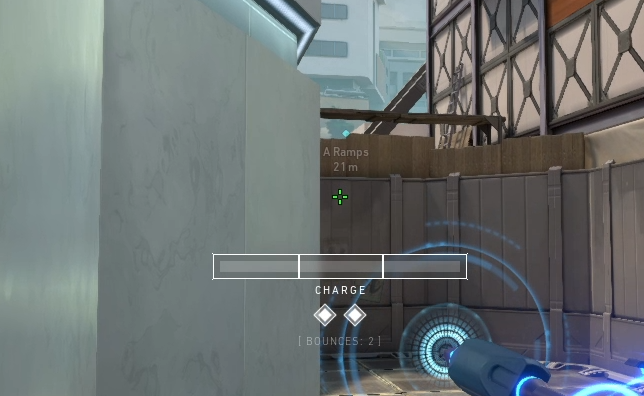
3. Place the Tip of the Left Bounce indicator on this corner:
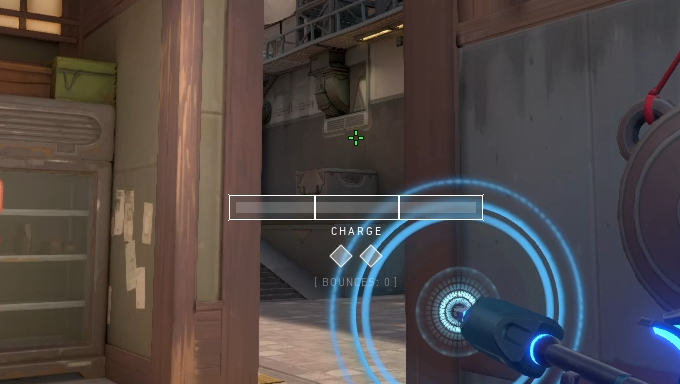
4. Two Bounces + Max Charge:

If done correctly, the Recon Bolt should bounce off the door frame at the B-Main Entrance and land here:
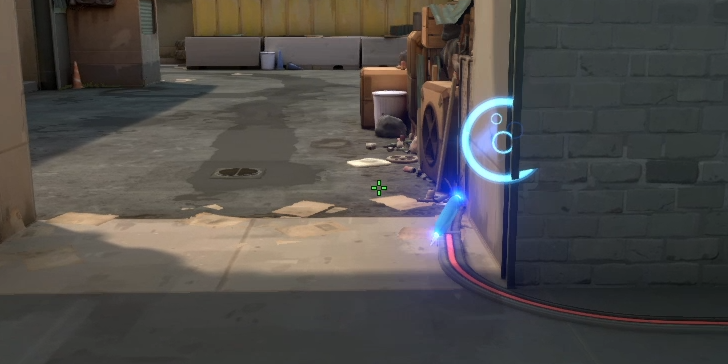

And reveal most of B-Main and some of B-Lobby:

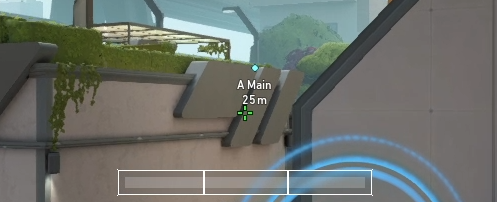
Split Defending – A-Main Early Information Recon Bolt

This next Sova Recon Bolt Lineup is good for gathering A-Main early information. This Recon Bolt is easy to line up and lands fast since it does not require any bounce charges.
A-Main is the only reliable way to get into A-Site since the other passageway, Middle to Vents is practically impossible to cross safely and reliably as an Attacker.
Knowing this, A-Main is a very important area to gain quick info on at the start of the round because it gives you and your team an early headcount which can help your team reposition accordingly.
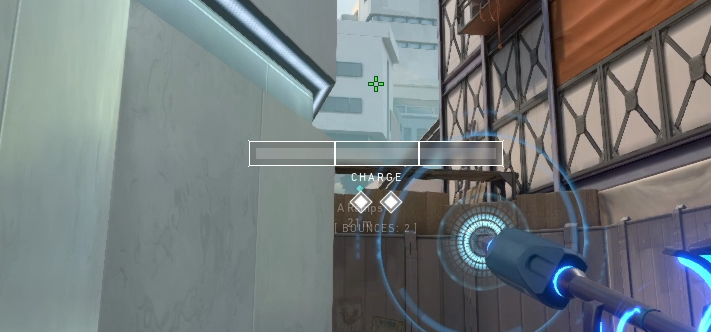
- Look for this corner at A-Site Rafters:

2. Stand and hug the corner:

3. Turn around and look for this trapezoid shape on the wall:
4. Place the left tip of the right bounce indicator on the top right corner of this trapezoid:
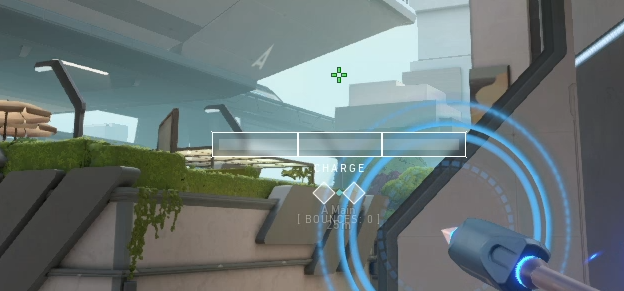
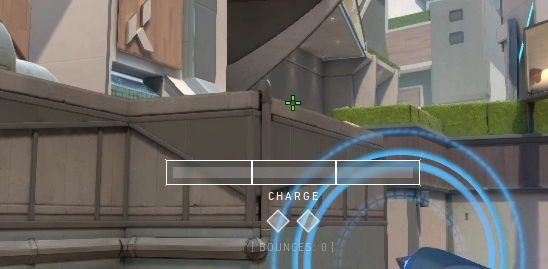
5. No-Bounce + 2-bar Charge:


If done correctly, the Recon Bolt should land here:

And reveal most of A-Main:

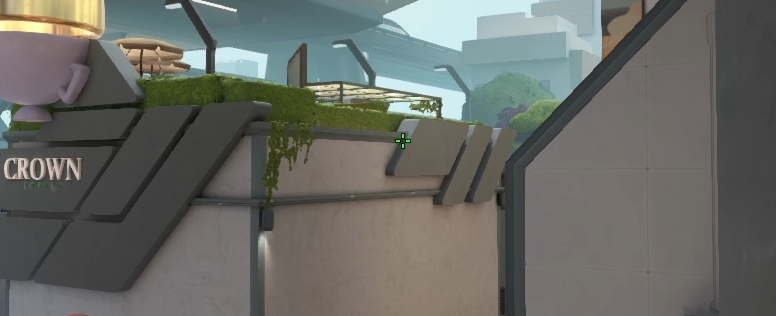
Split Attacking – Mail Recon Bolt

Split-Middle is arguably the most critical area to take control of on Split because it splits (yup) the map for Defenders, which will make it harder for them to rotate over to both A and B sites.
The moment Attackers have gained control of Middle. They will inevitably also gain control of A Heaven or B Heaven. This will make it difficult for Defenders to rotate since rotation lanes will now be blocked off and held by Attackers.
With this in mind, this next Recon Bolt Lineup will help you and your team take middle control by clearing off Mail, Top Middle, and even some of the Vents. Along with a coordinated plan of attack, this Recon Bolt lineup will complement your strategy and help you take central control relatively quickly.
- Stand next to this wall in Ramen:


2. Turn around and look for this Box:

3. Place your crosshair just above the black marking on this box:
4. Do 2 Bounces + Max Charge:


If done correctly, the Recon Bolt should land here:

And reveal all of Mail, some of B Heaven, all of top mid, and even some of the Vents:
Split Attacking – Heaven/A-Site Recon Bolt

There are a ton of different angles in different elevations on the Split A-site, making it very difficult for Attackers to enter the site. Let’s not start with how Attackers can gain control of the A-site.
A-Ramps and Heaven/Tower are the most important areas to gain control of as an Attacker. Whenever Attackers gain control of A-Heaven, most of the Defenders’ rotational lanes will likely be blocked off. Defenders rotating towards A-Site will have difficulty helping their teammates on A-site because they will have to pass through Vents or Defender Spawn, which are dangerous areas to push when Attackers have gained control of the spots above.
A-Ramps and Rafters are some of the more common angles in Split A-site. With this in mind, this following Recon Bolt lineup will reveal almost all of A-Heaven, Rafters, Ramps, and even some of A-site.
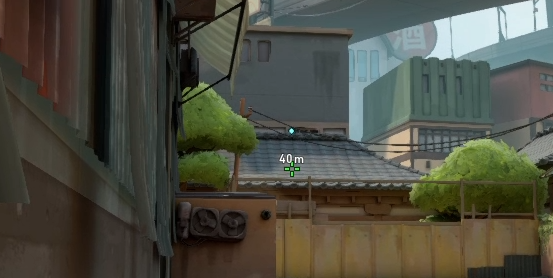
- Look for these plant boxes at A-Main:

2. Stand on the tallest box while keeping yourself against the right wall as well:

3. Inch forward until you can no longer see the brown sides of the Plant Box:

4. Look up towards this wall and look for the first line from the left:

5. Place your crosshair just slightly to the right of this line. Like this:
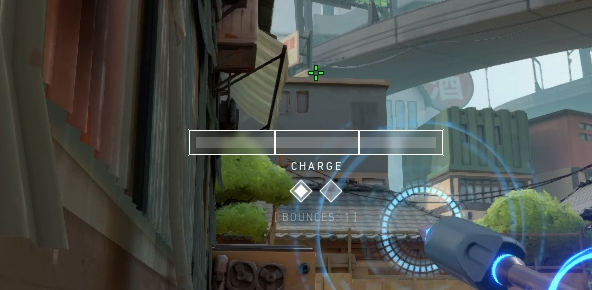
6. No-Bounce + 3-Bar Charge:


If done correctly, the Recon Bolt should land here:

And reveal almost all of A-Heaven, Rafters, Ramps, and even some of A-site.


Split Attacking – B-Site Recon Bolt

Split B-site funnels Attackers towards a five-meter wide passageway to enter the site. To add insult to injury, Attackers must clear five or more angles to enter the site safely. Without smokes or walls of any kind, this will be a death sentence to any Attacker that tries to enter B-site.
This is where our B-site Recon Bolt comes in.
This last Recon Bolt Lineup reveals almost all of the five-plus angles you and your team would otherwise have to clear. This B-site Recon Bolt Lineup will clear out B-site, B-Heaven, Drop, and even Rafters. Your Owl Drone will clear out other angles which can’t be removed by this Recon Bolt.
- Look for the Kingdom Kola vending machine next to the B-Main Entrance:

2. Tuck yourself into the corner:

3. Turn around and look for this small window on the building:
4. Place the tip of the right bounce indicator on this corner:
5. One Bounce + Max Charge:


If done correctly, the Recon Bolt should land here:

And reveal most of the B-site, Rafters, Ropes, and Default:
Splitting Arrows

Even though Split seems like a terrible map for Sova’s Recon Bolt, any good Sova player will still be able to impact their team by using Sova’s Recon Bolt and his other abilities.
Sova’s Recon Bolt is an excellent tool for revealing enemy locations. Players do not always have the craziest and cheesiest lineups to be effective with Sova. Simple Recon Bolt Lineups that get the job done quickly are better than flashy lineups that do not serve a good purpose for how your team is playing a certain map.